How to Check Transmission Fluid in a Manual Transmission
To check the transmission fluid in a manual transmission, locate the fill plug on the driver’s side. Warm up the engine for accurate readings, then park on a level surface. Remove the plug carefully and drain a small amount of fluid for inspection. Use a dipstick or tool to measure the level against the indicator. If low, refill with the correct fluid type, adding gradually and checking levels. Inspect the fluid’s color and consistency for contamination or degradation. Ensure not to overfill, as this can damage the transmission. Regular checks help maintain gear performance and overall transmission health.
Checking transmission fluid in a manual transmission is essential for maintaining optimal gear performance and overall vehicle health. Transmission fluid acts as a lubricant and coolant for the gears and bearings, preventing wear and tear. Unlike automatic transmissions, manual transmissions often require more effort to check fluid levels, as they may lack a dipstick. Regular fluid checks can help identify low levels or contamination early, preventing costly repairs. Understanding the process ensures smooth shifting and extends the lifespan of your manual transmission system.

Understanding the Importance of Transmission Fluid
Transmission fluid is vital for gear performance, acting as a lubricant, coolant, and protector. Low levels or contamination can cause overheating and transmission failure.

Why Transmission Fluid is Crucial for Manual Transmissions
Transmission fluid is essential for manual transmissions as it lubricates gears, prevents overheating, and ensures smooth clutch engagement. It also protects internal components from wear and tear.
How Transmission Fluid Affects Gear Performance
Transmission fluid plays a vital role in gear performance by lubricating moving parts, reducing friction, and preventing overheating. It ensures smooth shifting and protects gears from wear and tear. Clean, consistent fluid allows gears to engage and disengage seamlessly, maintaining optimal performance. Degraded or low fluid levels can lead to rough shifting, gear grinding, and potential failure. Regular checks and proper fluid maintenance are crucial to uphold gear health and ensure reliable transmission operation over time.

Preparing to Check the Transmission Fluid
Warm up the engine, park on a level surface, and gather tools like a socket wrench and rag. Ensure the vehicle is secure and accessible.
Gathering Necessary Tools and Materials
To check the transmission fluid, gather essential tools: a socket wrench or ratchet set, drain pan, funnel, clean rag, and safety gloves. Protective eyewear is recommended. Ensure you have the correct socket size for the fill plug, typically 3/8″ or 1/2″. A torque wrench may be needed for tighter plugs. Keep a service manual handy for reference. These tools will help you safely and effectively inspect and refill the transmission fluid, ensuring accuracy and preventing potential damage to the transmission system.
Warming Up the Engine for Accurate Readings
Before checking the transmission fluid, it’s essential to warm up the engine. Start the engine and let it run for about 10 minutes to ensure the fluid circulates properly. This step is critical because cold fluid can give inaccurate level readings. Drive the vehicle gently for a few minutes if necessary to distribute the fluid evenly. Avoid skipping this step, as it ensures the fluid level measurement reflects the actual condition of the transmission. Accurate readings are vital for maintaining optimal performance and health of the manual transmission system.
Parking the Vehicle on a Level Surface
Parking your vehicle on a level surface is crucial for accurate transmission fluid level readings. Ensure the car is on flat ground to prevent fluid from pooling unevenly. Engage the parking brake and place the transmission in neutral. This ensures the fluid level stabilizes, providing a true indication of the fluid’s condition. An inclined surface can misrepresent the fluid level, leading to incorrect assessments. Always verify the surface is even before proceeding with the fluid check to ensure reliability and safety.

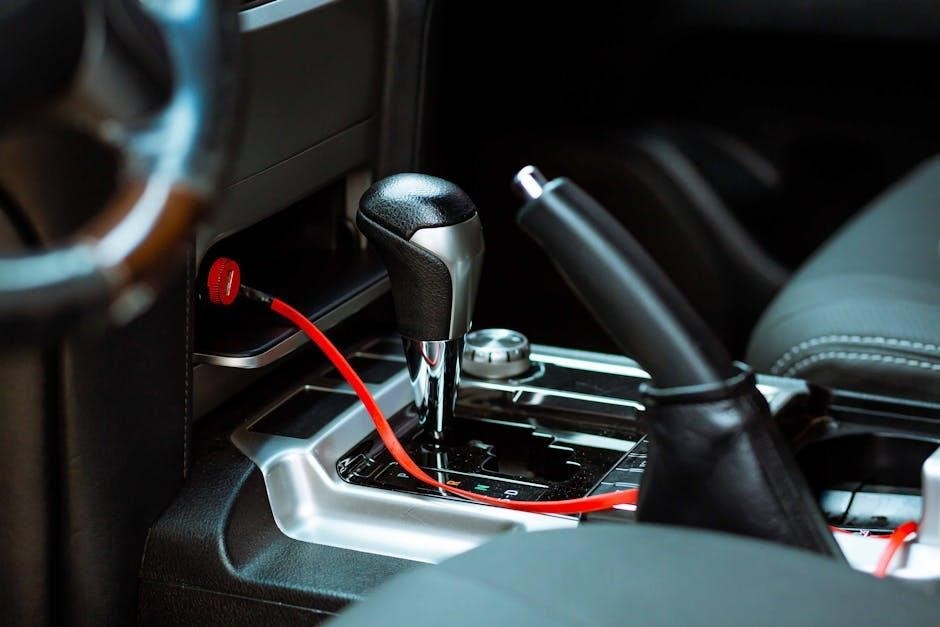
Locating the Transmission Fill Plug
The transmission fill plug is typically found on the driver’s side of the manual transmission. Consult your car’s manual to confirm its exact location. Use a wrench or socket to remove the plug for accessing the fluid. Ensure the vehicle is on a level surface for accurate fluid level assessment.
Identifying the Fill Plug Position on Manual Transmissions
The fill plug on a manual transmission is usually located on the driver’s side, near the midpoint of the transmission pan. For front-wheel-drive vehicles, it may be positioned towards the front, while rear-wheel-drive cars often have it closer to the firewall. Always refer to your vehicle’s service manual for precise location details, as variations exist between makes and models. This ensures you access the correct plug for fluid checks and avoids potential damage from incorrect removal.
Removing the Fill Plug Safely
To remove the fill plug safely, use a socket wrench or Allen key, depending on the plug type. Apply gentle force to break the gasket seal without stripping the threads. Once loosened, completely remove the plug by hand to avoid rounding. Be cautious, as transmission fluid may drip out. Use a drip pan to catch any spills. Inspect the plug and surrounding area for debris or damage. If the gasket is worn, replace it to prevent leaks. Clean the plug before reinstallation to ensure a proper seal.

Checking the Transmission Fluid Level
Ensure the vehicle is parked on a level surface and the engine is warmed up. Locate the transmission dipstick, typically near the firewall or driver’s side. Pull out the dipstick, wipe it clean with a lint-free cloth, and reinsert it to get an accurate reading. Check the fluid level against the dipstick’s markings. If low, use the correct fluid type specified in the owner’s manual and add it gradually, checking the level frequently to avoid overfilling. Inspect the fluid’s color and consistency for signs of degradation or contamination. Replace the dipstick securely and start the engine to check for leaks around the fill plug. Dispose of any used fluid responsibly.
Draining a Small Amount of Fluid for Inspection
To inspect the transmission fluid, drain a small amount into a clean drain pan. Locate the fill plug on the driver’s side of the transmission. Use a wrench to remove the plug safely, allowing the fluid to flow slowly. Collect the fluid and inspect its color and consistency. If the fluid appears dark, gritty, or has a burnt smell, it may indicate contamination or wear. Use a lint-free cloth to wipe the dipstick clean before reinserting it. Replace the fill plug securely once done. Dispose of the used fluid responsibly.
Refilling Fluid if Levels are Low
If the transmission fluid level is low, refilling it is essential to maintain proper gear function. Use a funnel to pour the fluid slowly into the fill plug opening. Ensure the fluid type matches the manufacturer’s specifications, as using the wrong fluid can damage the transmission. Add the fluid gradually, checking the level frequently with the dipstick or tool to avoid overfilling. Once the level reaches the recommended mark, replace the fill plug securely. Start the engine and check for leaks around the fill plug area. Allow the fluid to circulate before driving.
Measuring the Fluid Level Against the Indicator
Insert the dipstick or tool into the transmission until it rests on the bottom of the pan. Withdraw it and check the fluid level against the indicator marks. Ensure the level falls within the recommended range on the tool. Overfilling is harmful, so adjust the fluid carefully. If the level is too low, add fluid gradually, rechecking with the dipstick after each addition. The fluid should be at the midpoint of the indicator for optimal performance. Always refer to the tool’s measurements for accuracy.
Analyzing the Condition of the Transmission Fluid
Evaluate the fluid’s color, consistency, and smell to assess its health. Healthy fluid is typically pink or red with a smooth texture and no burnt odor. Discoloration or grit indicates contamination or degradation, suggesting a fluid change is needed to maintain transmission performance and longevity.
Evaluating the Color and Consistency of the Fluid
Evaluate the fluid’s color and consistency by placing it on a white surface. Healthy transmission fluid is typically pink or red with a smooth, even texture. If the fluid appears dark, murky, or has a gritty feel, it may be degraded or contaminated. Black or burnt-smelling fluid indicates overheating or wear. Consistency should be thin and free of clumps or sediment. Any deviation from these characteristics suggests the fluid needs to be replaced to ensure proper transmission function and longevity.
Identifying Signs of Contaminated Fluid
Contaminated transmission fluid often shows visible signs such as particles, debris, or discoloration. If the fluid appears milky, frothy, or has a dark, gritty texture, it may be contaminated with water, dirt, or metal shavings. A burnt smell or unusual odor indicates overheating or internal wear. Additionally, if the fluid feels thick or lumpy, it could signal contamination from external sources. These signs suggest the fluid needs immediate replacement to prevent damage to gears, seals, or clutch packs, ensuring smooth transmission operation and longevity.
Smelling the Fluid for Burnt Odors
A burnt odor in transmission fluid indicates overheating or internal damage. If the fluid smells charred or acrid, it may signal worn clutches, gears, or excessive heat buildup. This is a critical diagnostic clue, as burnt fluid cannot lubricate effectively and may cause irreversible damage. If you detect a burnt smell, stop using the vehicle and consult a professional immediately. Ignoring this sign can lead to costly repairs, such as replacing gears or the entire transmission system.

Interpreting the Results of the Fluid Check
Normal fluid levels indicate proper lubrication and transmission health. Low levels suggest leaks or wear, while excessive fluid may damage seals. Fluid condition reveals internal wear or contamination, guiding necessary repairs or maintenance.
Understanding Normal vs. Low Fluid Levels
A normal fluid level ensures proper lubrication and gear performance in a manual transmission. It is typically indicated by the fluid reaching the designated mark on the dipstick or tool. Low fluid levels, however, signal potential issues such as leaks, worn seals, or excessive wear on internal components. If the fluid is below the minimum mark, the transmission may overheat or experience gear engagement problems. Accurate measurement is crucial to avoid damage and ensure smooth operation. Always refer to the vehicle’s manual for specific guidelines.
Recognizing Overfilled Transmission Fluid Symptoms
Overfilling the transmission fluid can lead to serious issues. Common symptoms include foamy or bubbling fluid, which reduces its lubricating properties. Excess fluid may leak from the fill plug or seals, causing messy drips under the vehicle. The transmission may also produce unusual noises, such as whining or grinding, due to the fluid’s inability to circulate properly. Additionally, overfilling can create pressure buildup, leading to premature wear on internal components like gears and bearings. It is essential to address overfilling promptly to prevent costly repairs.

Refilling Transmission Fluid Correctly
Use the correct type of transmission fluid specified by your vehicle’s manufacturer. Add fluid gradually, checking the level frequently with the dipstick or tool to avoid overfilling. Ensure the fluid reaches the recommended level for optimal performance and to prevent damage to internal components. Always refer to your owner’s manual for guidance on the proper refilling procedure.
Using the Right Type of Transmission Fluid
Using the correct type of transmission fluid is essential for maintaining your manual transmission’s health. The wrong fluid can cause gear damage, slippage, or premature wear. Always consult your vehicle’s owner’s manual to identify the recommended fluid type, as different transmissions require specific formulations. Common types include gear oil, ATF, or synthetic fluids, depending on the manufacturer’s specifications. Using the wrong fluid can lead to costly repairs, so double-check the manual before refilling. Ensure compatibility to maintain optimal performance and longevity of your transmission system.
Adding Fluid Gradually and Checking Levels
When adding transmission fluid to a manual transmission, it’s crucial to do so gradually and check the levels frequently to avoid overfilling. Start by ensuring the vehicle is parked on a level surface and the engine is warm for accurate readings. Locate the fill plug, typically on the driver’s side, and remove it carefully. Use a funnel to pour in the correct type of fluid, as specified in the owner’s manual. After each small addition, recheck the fluid level using the dipstick or indicator. Continue this process until the level reaches the recommended mark. Avoid overfilling, as it can lead to pressure issues and potential damage to the transmission. Once the level is correct, replace the fill plug securely and start the engine to circulate the new fluid. Finally, take the vehicle for a short drive and recheck the fluid level to ensure everything is functioning properly. Regular maintenance checks will help maintain the health and performance of your manual transmission.

Final Checks and Maintenance Tips
After refilling, inspect for leaks around the transmission and ensure the vehicle is on a level surface. Regularly check the transmission fluid level and condition, adhering to the recommended maintenance schedule to maintain optimal performance and prevent damage to the manual transmission.
Inspecting for Leaks After Refilling
After refilling the transmission fluid, inspect the area around the transmission for any signs of leaks. Ensure the vehicle is parked on a level surface to accurately assess fluid levels. Check the fill plug and surrounding areas for any visible fluid drips or puddles. Visually examine all connections, including the drain plug and other transmission components, for moisture or fluid accumulation. Use a paper towel or drip pan to catch any drips during the inspection. If a leak is detected, tighten any loose connections or replace worn-out gaskets and seals promptly to prevent further damage. Additionally, consider a short test drive to identify any leaks that may only appear when the transmission is in operation. Addressing leaks immediately is crucial to maintain the health and functionality of the manual transmission.
Regular Maintenance Schedule for Fluid Checks
Regularly checking transmission fluid is essential for maintaining manual transmission health. Schedule fluid checks every 6 to 12 months or as recommended by your vehicle’s manufacturer. Additionally, inspect the fluid after extreme driving conditions, such as frequent city driving, towing, or off-road use. Always warm up the engine before checking to ensure accurate readings. Keep a maintenance log to track fluid levels and conditions, and set reminders to stay consistent. Regular checks prevent contamination and wear, ensuring optimal gear performance and longevity.
Regularly checking and maintaining transmission fluid is crucial for the longevity and performance of a manual transmission. Proper fluid levels and condition ensure smooth gear operation and prevent damage. By following the steps outlined, including warming up the engine, locating the fill plug, and using the correct fluid type, you can maintain optimal transmission health. Schedule regular checks every 6 to 12 months or after extreme driving conditions to prevent contamination and wear. Consistent maintenance will help extend the lifespan of your manual transmission and ensure reliable performance.