Welcome to our comprehensive guide on kitchen island plans! Discover how to enhance your kitchen’s functionality and style with detailed PDF plans, material lists, and step-by-step instructions․
1․1 What are Kitchen Island Plans?
Kitchen island plans are detailed guides that help you design and build a functional and stylish kitchen island․ They typically include material lists, step-by-step instructions, and diagrams to ensure a successful project․ Whether you’re a DIY enthusiast or a professional, these plans provide everything you need to create a custom island that fits your kitchen’s unique space and style․
1․2 Benefits of Using Kitchen Island Plans
Kitchen island plans offer a budget-friendly way to enhance your kitchen’s functionality and style․ They provide detailed guides, material lists, and step-by-step instructions, ensuring a professional result․ With customizable designs, you can tailor your island to fit your space and preferences․ Whether you prefer modern, rustic, or minimalist styles, these plans help you create a focal point that adds storage, seating, and cooking space, transforming your kitchen into a functional and stylish hub․
1․3 What to Expect in This Article
This article provides a comprehensive guide to kitchen island plans, covering types, materials, and DIY tutorials․ Explore design ideas, storage solutions, and budgeting tips․ Learn about electrical and plumbing considerations, safety tips, and how to choose the right size and layout․ Whether you’re a DIY enthusiast or planning a custom project, this guide offers detailed insights to help you create a functional and stylish kitchen island tailored to your needs․

Types of Kitchen Islands
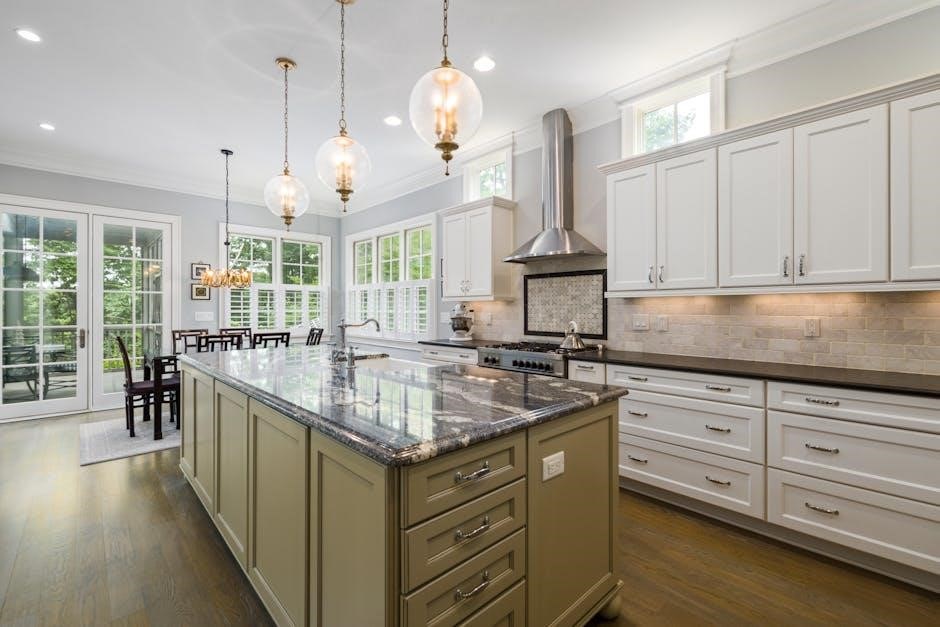
Explore various kitchen island types, such as stationary, portable, and specialty designs, including those with seating or storage, to suit different kitchen styles and needs․
2․1 Stationary vs․ Portable Kitchen Islands
Stationary kitchen islands are permanent fixtures, offering ample storage and countertop space, often featuring sinks or stoves․ Portable islands, like carts or rolling units, provide flexibility and versatility, ideal for small kitchens or changing layouts․ Choose based on your space and needs—stationary for stability, portable for adaptability, ensuring functionality and style in your kitchen design․
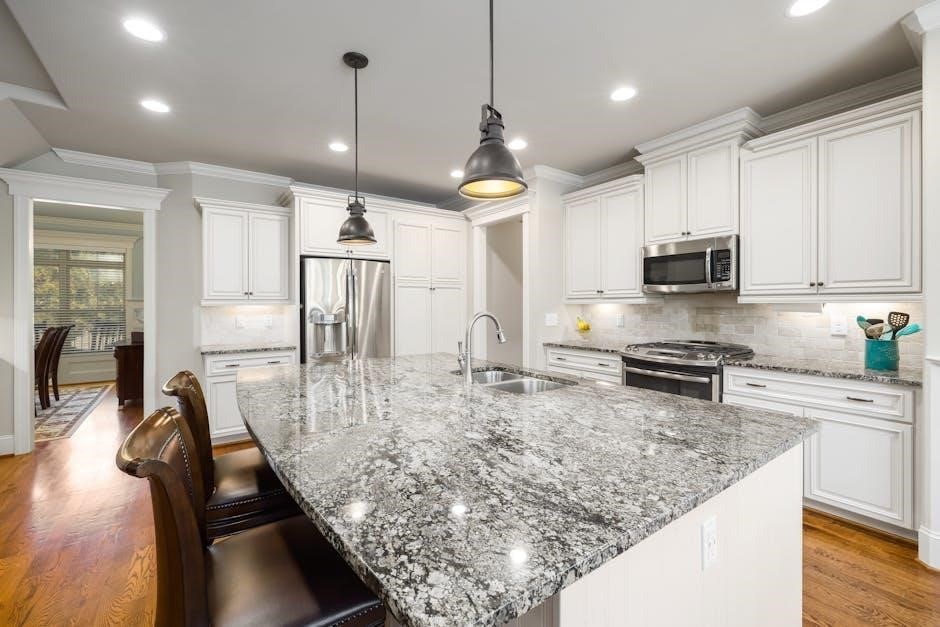
2․2 Kitchen Islands with Seating
Kitchen islands with seating combine functionality and style, offering a space for dining or casual gatherings․ These designs often include built-in benches, stools, or chairs, creating a cozy area for family and guests․ They can also feature storage cabinets or shelves, maximizing utility․ Ideal for modern kitchens, seating islands serve multiple purposes, blending practicality with aesthetic appeal, and are a popular choice in many DIY kitchen island plans․
2․3 Specialty Kitchen Islands (e․g․, Outdoor, Bar-Style)
Specialty kitchen islands offer unique functionality, such as outdoor designs for al fresco dining or bar-style setups for entertaining․ Outdoor islands often feature weather-resistant materials, while bar-style islands include raised counters and stools․ These designs enhance specific kitchen needs, blending practicality with style․ They are perfect for creating focal points in large kitchens or outdoor spaces, offering tailored solutions for modern lifestyles․
Choosing the Right Size and Layout
Choosing the right size and layout ensures your kitchen island enhances functionality and aesthetics․ Measure your space, align with purpose, and select a layout that complements your kitchen’s workflow and style․
3․1 Measuring Your Kitchen Space
Accurate measurements are crucial for a well-fitted kitchen island․ Measure the length, width, and any obstacles like door swings or pathways․ Consider the workflow triangle to ensure efficient movement․ Use a tape measure and graph paper to map your space, ensuring the island fits seamlessly without obstructing traffic flow or essential work areas․
3․2 Determining the Purpose of Your Kitchen Island
Before designing, define your kitchen island’s purpose․ Will it serve as extra counter space, storage, seating, or a spot for appliances? Consider how it will be used daily to ensure functionality․ A clear purpose guides design choices, helping you create a space that enhances workflow and meets your needs, whether for food preparation, dining, or additional storage․
3․3 Popular Layouts for Kitchen Islands
Popular kitchen island layouts include L-shape, U-shape, and galley designs․ L-shape islands offer ample counter and storage space, while U-shape layouts maximize workflow for larger kitchens․ Galley layouts are ideal for narrow spaces, providing efficiency without sacrificing functionality․ Standalone islands with seating or storage are also trendy, blending practicality with style․ These layouts enhance both aesthetics and usability, catering to various kitchen sizes and needs․
Materials and Finishes
Explore durable materials like butcher block, laminate, and wood, paired with stylish finishes such as distressed, glossy, or matte․ These options suit modern and minimalist kitchen styles perfectly․
4․1 Common Materials for Kitchen Islands
Popular materials for kitchen islands include butcher block, wood, laminate, and stainless steel․ Butcher block offers a warm, natural look, while wood provides durability and aesthetic appeal․ Laminate is budget-friendly and easy to maintain, and stainless steel adds a sleek, modern touch․ Each material offers unique benefits, allowing you to choose based on your style, budget, and kitchen needs for optimal functionality and design․
4․2 Choosing the Right Finish for Your Island
Selecting the perfect finish for your kitchen island involves balancing style and durability․ Consider glossy, matte, or satin finishes to match your kitchen’s aesthetic․ Wood finishes, like oak or walnut stains, add warmth, while painted options offer versatility․ Metal finishes, such as stainless steel or brass, provide a modern look․ Ensure the finish complements your countertop and cabinetry for a cohesive design that enhances functionality and visual appeal․
Storage Solutions
Maximize your kitchen island’s potential with practical storage solutions․ Built-in cabinetry, open shelving, and drawers provide ample space for utensils, cookware, and ingredients, ensuring organization and easy accessibility․
5․1 Built-In Cabinetry
Built-in cabinetry offers a sleek and functional storage solution for your kitchen island․ Customize with drawers, shelves, or compartments to optimize space․ Detailed PDF plans provide material lists and step-by-step instructions, ensuring professional results․ Choose from various designs to match your kitchen style, enhancing both aesthetics and functionality while keeping essentials within easy reach․
5․2 Open Shelving
Open shelving adds a modern, airy feel to your kitchen island while keeping essentials within easy reach․ Perfect for displaying cookbooks, utensils, or decorative items, these shelves can be customized to fit your style․ Detailed PDF plans provide guidance on materials and installation, ensuring a seamless integration with your island’s design․ This option offers both functionality and visual appeal, enhancing your kitchen’s aesthetic․
5․3 Drawers and Countertops
Drawers and countertops are essential components of a functional kitchen island․ Drawers provide ample storage for utensils and cookware, while countertops offer a durable workspace․ PDF plans often include designs for integrating drawers and selecting the perfect countertop material, such as granite, quartz, or butcher block․ These elements combine practicality with style, ensuring your island meets both storage and aesthetic needs while complementing your kitchen’s overall design․
Electrical and Plumbing Considerations
Plan electrical outlets for appliances and consider plumbing needs for sinks or stovetops․ Ensure safe and functional installations with proper wiring and water supply connections․
6․1 Adding Electrical Outlets
Adding electrical outlets to your kitchen island enhances functionality․ Plan for GFCI-protected outlets near water sources and consider USB ports for modern convenience․ Ensure outlets are installed at a safe height and distance from sinks or cooking areas․ Consult a licensed electrician for proper wiring and compliance with local codes․ Detailed PDF plans often include outlet placement guides to ensure seamless integration and safety in your design․
6․2 Installing a Sink or Stovetop
Installing a sink or stovetop in your kitchen island requires careful planning․ Ensure proper plumbing and ventilation for sinks and stovetops․ Professional installation is recommended to meet safety and code requirements․ PDF plans often include detailed diagrams for integrating these features seamlessly․ Consider the workflow and safety precautions to create a functional and efficient cooking or prep area in your kitchen island design․
DIY vs․ Custom or Pre-Made Kitchen Islands
Explore DIY kitchen island plans with PDF guides or opt for custom/pre-made solutions․ DIY offers cost savings and personalization, while custom islands provide professional design and convenience․
7․1 Pros and Cons of DIY Kitchen Island Plans
DIY kitchen island plans offer cost savings, personalization, and a sense of accomplishment․ They provide step-by-step guides and material lists, making projects accessible․ However, DIY requires time, effort, and some skill․ Mistakes can be costly, and complex designs may overwhelm beginners․ Despite challenges, DIY projects empower homeowners to create custom solutions tailored to their space and style․
7․2 When to Choose a Custom or Pre-Made Island
Opt for a custom or pre-made kitchen island when you desire a perfect fit for your space or need specific features like seating or storage․ Pre-made islands offer convenience and quick installation, while custom designs cater to unique styles or layouts․ They are ideal for homeowners seeking professional-grade results without the time or skills for DIY projects, ensuring durability and a polished finish tailored to their needs․
Safety and Functionality
Ensure your kitchen island is stable, well-lit, and equipped with electrical safety features․ Incorporate practical storage and seating solutions to enhance functionality while maintaining a safe working environment․
8․1 Safety Tips for Building and Using Your Island
Always follow safety guidelines when building or using your kitchen island․ Ensure the island is stable and secure to prevent tipping․ Use proper tools and protective gear during construction․ Keep electrical outlets away from water sources and ensure all wiring is safely installed․ Regularly inspect the island for damage and test its weight capacity․ Maintain a clear workspace to avoid accidents and ensure proper ventilation when working with materials․
8․2 Ensuring Functionality in Your Design
Ensure your kitchen island design is both practical and functional by incorporating task-specific zones․ Design the layout to enhance workflow, with ample counter space and storage․ Consider adding built-in seating or a sink to maximize usability․ Integrate open shelving or drawers for easy access to utensils․ Make sure the island complements your kitchen’s workflow and meets your daily needs, creating a space that is both efficient and enjoyable to use․
Budgeting for Your Kitchen Island Project
Plan your budget by estimating material and tool costs․ Consider DIY options to save money․ Allocate funds for finishes and storage solutions to stay within your budget․
9․1 Estimating Costs for Materials and Tools

Estimate costs by listing materials like lumber, countertops, and hardware․ Tools may include saws, drills, and sanders․ PDF plans often provide detailed lists to help calculate expenses accurately and avoid budget overruns․
9․2 Tips for Saving Money on Your Kitchen Island
To save money, consider using reclaimed or affordable materials like laminate instead of granite․ Opt for pre-made cabinets or repurpose old furniture․ Simplify the design to reduce labor costs․ Shop during sales or use coupons for tools and supplies․ DIY projects can significantly lower expenses compared to hiring professionals․
- Choose cost-effective materials․
- Opt for a simpler design․
- Shop for discounts on tools and supplies․